How to Create a Dutch Door Bullet Journal Layout Step-by-Step

by - February 05, 2022

 Dutch door bullet journal layouts have been so popular recently! You are probably wondering how you can level up your bullet journal by creating dutch door bullet journal layouts like the ones you see on social media. Well, don't worry because today, I'll be dishing out the tips and tricks on how you can create dutch door bullet journal layouts like the best of them in an easy-to-follow step-by-step manner!
How to Create a Dutch Door Bullet Journal Layout Step-by-Step


Side Note - This post may contain affiliate links, which means if you buy something from one of these links, I may receive a small commission at no cost to you. For more information, you can read my privacy policy. Thank you for supporting my blog. :)

Updated for 2024

I took the dive and started making more dutch door bullet journal layouts recently so I wanted to share what I've learned along the way so you can create super cute dutch door bullet journal layouts too!

I made a few mistakes when making some of my dutch door bullet journal layouts, and I don't want you to make these same mistakes!

But first of all, why should you even create a dutch door bullet journal layout?


The Purpose of a Dutch Door Bullet Journal Layout
Do you ever wish you could have more space on your bullet journal layout? Or that you didn't have to rewrite the same information over and over again on related pages? Or how about having those adorable doodles you drew on one page, be visible on multiple pages?

This is where a dutch door bullet journal layout can help!

With a dutch door layout, you can have that cute design show on multiple pages, you can have important information on multiple pages without having to rewrite it over and over and over again, and you can add a little extra flair to your bullet journal.

I know it might seem ridiculous to cut off part of a page in your notebook to make extra room to write, but it truly works. It can be scary to cut up your bullet journal for the first time though so I'm going to walk you through the process step-by-step to help you eliminate errors!

Let's get right into how you can create a dutch door layout in your bullet journal!

How to Create a Dutch Door Bullet Journal Layout Step-by-Step


How to Create a Dutch Door Bullet Journal Layout Step-by-Step

1. Find Some Inspiration

I know, I know. This tip is soooo cliche. Honestly, you see it every single time you read a blog post about bullet journaling, but that is because it really works!

Especially, if you don't understand fully what a dutch door bullet journal layout is, finding inspiration will be an important step. You can get a feeling of all the different things you can do with a dutch door bullet journal layout by looking at what other people are doing. I definitely haven't tried all the different dutch door layout styles myself!

Along with the above advice, it is important for me to add: don't feel overwhelmed if you see a lot of amazing dutch door bullet journal layouts.

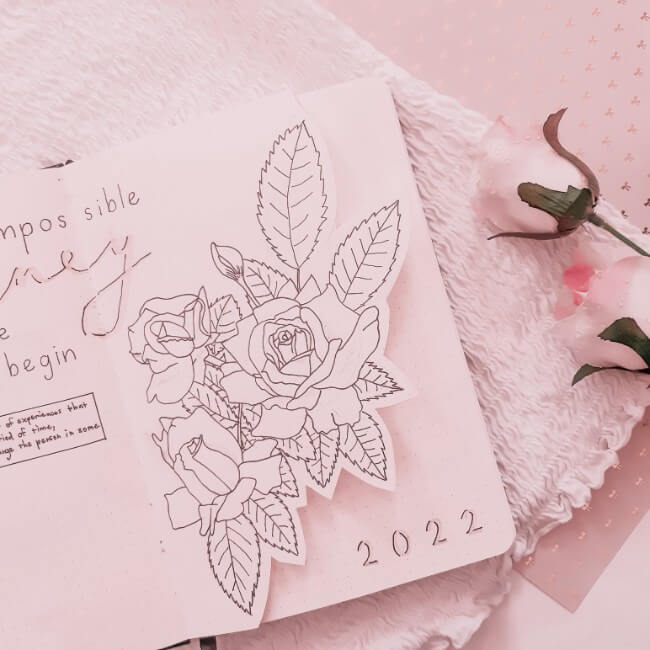
The cover page of my 2022 bullet journal took me around two hours to draw so please don't think it was easy to do! Creating dutch door layouts that look like that is going to take some practice unless you already have art skills. Even I have seen some dutch door bullet journal layouts that look intimidating and I took art lessons for nine years!

I recommend starting out with a very simple dutch door layout if this is your first time making a dutch door layout. For example, just cutting off a vertical part of the page. If you are just starting a new bullet journal, making a dutch door layout right off the bat will help get rid of the fear of making mistakes!

2. Figure Out the Purpose of Your Dutch Door Bullet Journal Layout

If you want to add a dutch door bullet journal layout to your bullet journal just to add it, then I wouldn't necessarily recommend doing that because when you make a dutch door page, you are removing space from the page that could be used for something else.

Here are a few purposes for creating a dutch door layout in your bullet journal...

  • Using the dutch door to bookmark a page
  • Using the dutch door to hide personal information
  • Using the dutch door to keep important information visible on multiple pages
  • Using the dutch door for convenience
  • Using the dutch door to create more space for a layout
  • Using the dutch door as decoration

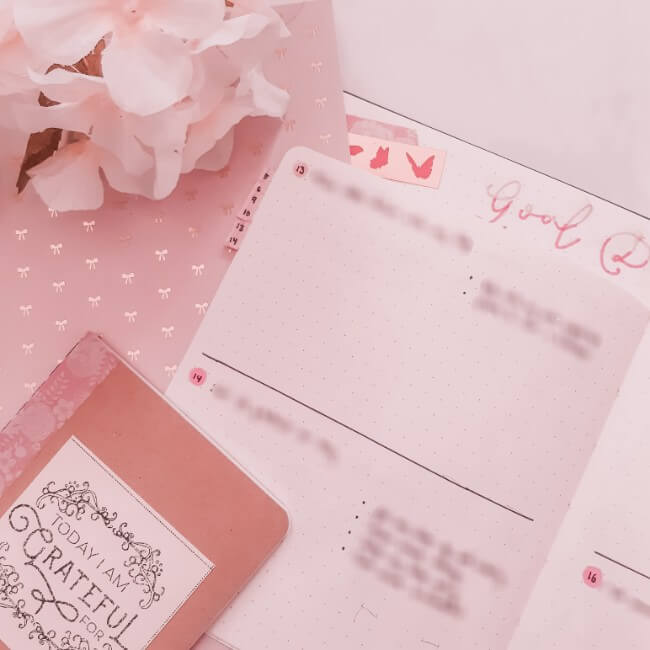
On the layout before, I wanted space to write down notes about each of my goals for the year, but I didn't want to have to draw the header on each page. My solution was to utilize a dutch door bullet journal layout.

After you decide what the purpose of your dutch door layout will be, it is time to start making it!

How to Create a Dutch Door Bullet Journal Layout Step-by-Step

3. Draw the Page + Check Your Measurements Twice

If you don't use a pencil regularly in your bullet journal, now is for sure the time to grab one! Open up your bullet journal, and decide how you want your layout to look. Design it out with a pencil, and count out how many pages you will need.

You can even make a dutch door by simply folding the page in half.

Once you have your design drawn with a pencil, you have a choice. You can either cut first or you can finish the design first. Personally, if it is art, I do the design first, and then I cut the page, but if the dutch door is mainly for function and convenience, then I cut first.

Before you grab your scissors or Exacto knife, I recommend checking your measurements twice or even three times because if you mess up, it will be harder to fix.

4. Cut it Up

Now, it is actually time to cut up your bullet journal! 😱 This is where I have made mistakes. Due to trial and error, I have found that I prefer using scissors over an Exacto knife.

Even though an Exacto knife is more "exact", it is also sharper and harder to control how many pages you cut through. Eek!

If I am removing part of the page near the notebook spine, I find it is actually easier to just rip the page right there. If you do want to use an Exacto knife though, I recommend using a ruler to keep your knife cutting straight. You may also want to just cut halfway through the edge of the paper and then rip it afterward.

Also, it is a good idea to have a sheet of something hard like plastic underneath the page you are cutting with an Exacto knife so you don't accidentally cut through too many pages.

How to Create a Dutch Door Bullet Journal Layout Step-by-Step


5. Finishing Your Dutch Door Bullet Journal Layout

Your layout is almost done! All you have to do now is finish decorating your layout if you want to. Some people may add a strip of washi tape along the edge of the layout as decoration.

If you cut the page before you finished your design, now is the time to finish it up!


Fixing Errors You Made on Your Dutch Door Bullet Journal Layout
I already wrote a whole blog post on how to fix bullet journal mistakes so if you do make an error in your bullet journal, you may find that post helpful. There are a few errors though that are specific to making dutch door bullet journal layouts.

The biggest error would probably be cutting too near the spine of your notebook, so another page starts coming out. Unfortunately, one of the only ways to fix this is to put a piece of regular tape or washi tape across the page that is falling out and the page next to it to connect them back together.

If you accidentally cut off a tab, you can use a sticker or washi tape to make a new one. If you accidentally cut a page too small, you can add a strip of washi tape folded along the edge to make the page a little wider.

Hopefully, it won't, but if worst comes to worst, you can cut the whole page out, glue another page on top to make it a full page again, or you can glue the page in front and behind the dutch door together.

Mistakes happen all the time! Don't be worried if you make a mistake on your dutch door bullet journal page! You can always improve next time.

How to Create a Dutch Door Bullet Journal Layout Step-by-Step


How to Create a Dutch Door Bullet Journal Layout Step-by-Step

Take the leap and make that dutch door bullet journal layout! The worst that can happen is that you'll make a mistake. When you make a mistake, you learn, so it is not going to be a loss, and most people only use a bullet journal notebook for a year anyway.

If your notebook starts falling apart, you can hold it together with tape until the end of the year! 😂

Make sure you read these posts too!

I hope these tips help you create your first or next dutch door bullet journal layout! Have a productive week!
Share this pin if you found this post helpful. Thank you! :)

How to Create a Dutch Door Bullet Journal Layout Step-by-Step

Get the Newest Post Straight to Your Inbox